
Mitsubishi Outlander: Forward Clutch
DISASSEMBLY AND ASSEMBLY
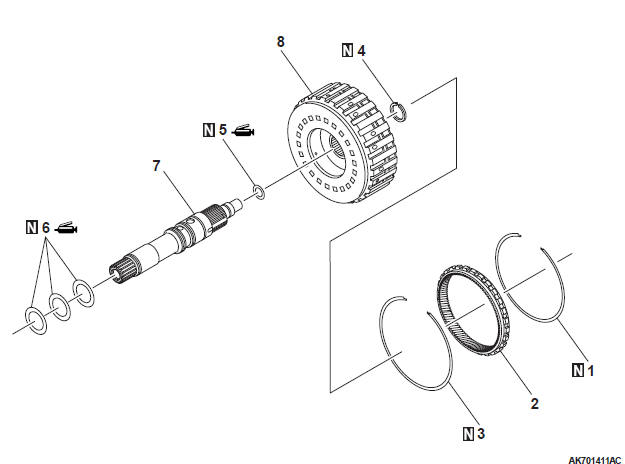
Disassembly steps
- Snap ring
- Internal gear
- Snap ring
- Snap ring
- Seal ring (small)
- Seal ring (big)
- Input shaft
- Forward clutch sub-assembly
DISASSEMBLY SERVICE POINT
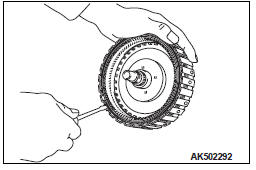
SNAP RING REMOVAL
Using a flat blade screwdriver etc., remove the snap ring from the forward clutch drum.
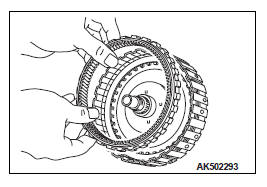
INTERNAL GEAR REMOVAL
Remove the internal gear from the forward clutch drum.
SNAP RING REMOVAL
Using a flat blade screwdriver etc., remove the snap ring from the forward clutch drum.
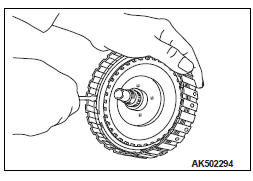
SNAP RING REMOVAL
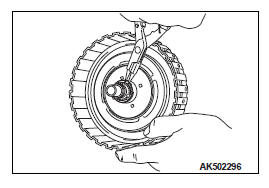
Remove the snap ring using snap ring pliers, and remove the input shaft from the forward clutch drum.
SEAL RING REMOVAL
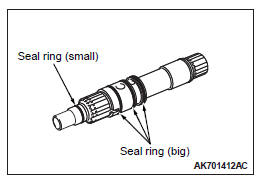
Remove the seal rings (small and big) from the input shaft.
REASSEMBLY SERVICE POINT
SEAL RING INSTALLATION
CAUTION
- Apply vaseline when installing the seal rings.
- Do not re-use the seal rings.
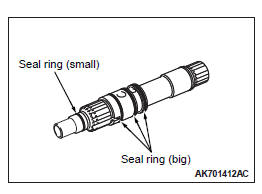
Install the seal rings (small and big) on the input shaft.
SNAP RING INSTALLATION
CAUTION
- Be careful not to strain the snap ring by expanding it excessively.
- Do not re-use the snap ring.
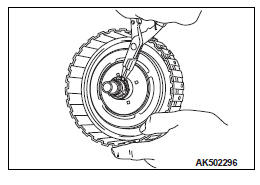
Install the input shaft on the forward clutch drum, and attach the snap ring.
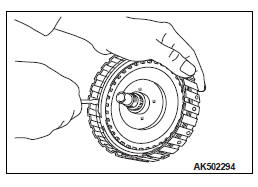
SNAP RING INSTALLATION
CAUTION Do not re-use the snap ring.
Install the snap ring on the forward clutch drum.
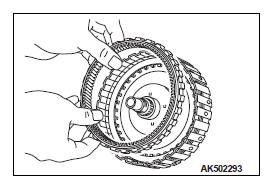
INTERNAL GEAR INSTALLATION
Install the internal gear on the forward clutch drum.
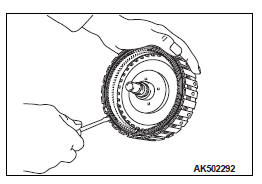
SNAP RING INSTALLATION
CAUTION Do not re-use the snap ring.
Install the snap ring on the forward clutch drum.
INSPECTION
FORWARD CLUTCH SUB-ASSEMBLY
Check if there is a damage, deformation, or burn marks, and replace the forward clutch sub-assembly if any defect is found.
INPUT SHAFT AND INTERNAL GEAR
Check if there is a damage or deformation, and replace if any defect is found.
READ NEXT:
 Reduction Gear
DISASSEMBLY AND ASSEMBLY
Nut
Reduction gear bearing
Reduction gear bearing
Reduction gear sub-assembly
Adjusting shim
Required special tools:
MB990810: Side bearing puller
MB990947: Lower a
Differential
DISASSEMBLY AND ASSEMBLY
Disassembly steps
Differential side bearing
Differential side bearing
Differential sub-assembly
Adjusting shim
Required special tools:
MB990810: Side bearing puller
SEE MORE:
On-vehicle Service
ID CODES REGISTRATION PROCEDURE
REGISTRATION USING SCAN TOOL MB991958
(M.U.T.-III SUB ASSEMBLY)
Required Special Tools:
MB991958 Scan Tool (M.U.T.-III Sub Assembly)
MB991824: Vehicle Communication Interface (V.C.I.)
MB991827 M.U.T.-III USB Cable
MB991910 M.U.T.-III Main Harness A
The ID
WCM, Transmitter, TPMS Transmitter
WCM
REMOVAL AND INSTALLATION
CAUTION
When WCM has been replaced, all key ID codes should be registered, referring to
the ID code registration
judgment table.
NOTE: Claw position is symmetrical
Removal steps
Ignition key cover
Steering column upper cover
Steering column lower cover
WCM
INSTA
