
Mitsubishi Outlander: Forward Clutch
DISASSEMBLY AND ASSEMBLY
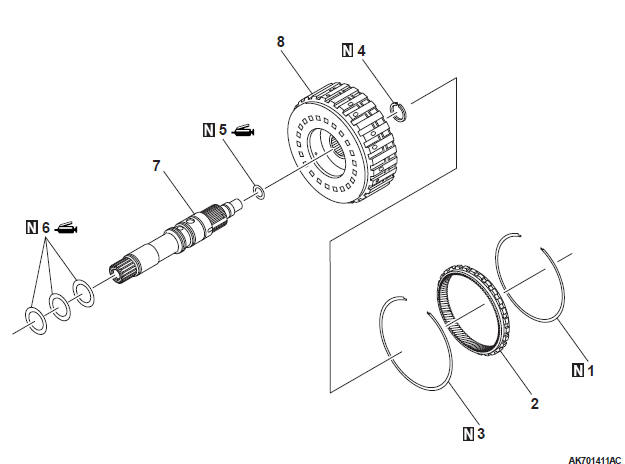
Disassembly steps
- Snap ring
- Internal gear
- Snap ring
- Snap ring
- Seal ring (small)
- Seal ring (big)
- Input shaft
- Forward clutch sub-assembly
DISASSEMBLY SERVICE POINT
SNAP RING REMOVAL
Using a flat blade screwdriver etc., remove the snap ring from the forward clutch drum.
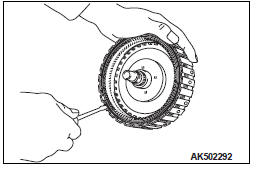
INTERNAL GEAR REMOVAL
Remove the internal gear from the forward clutch drum.
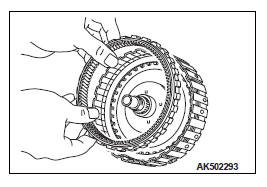
SNAP RING REMOVAL
Using a flat blade screwdriver etc., remove the snap ring from the forward clutch drum.
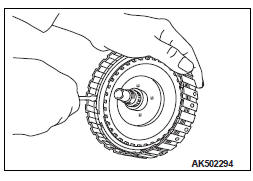
SNAP RING REMOVAL
Remove the snap ring using snap ring pliers, and remove the input shaft from the forward clutch drum.
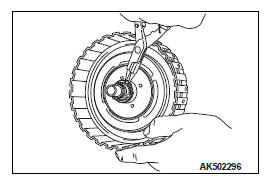
SEAL RING REMOVAL
Remove the seal rings (small and big) from the input shaft.
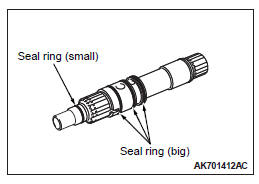
REASSEMBLY SERVICE POINT
SEAL RING INSTALLATION
CAUTION
- Apply vaseline when installing the seal rings.
- Do not re-use the seal rings.
Install the seal rings (small and big) on the input shaft.
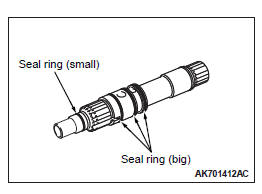
SNAP RING INSTALLATION
CAUTION
- Be careful not to strain the snap ring by expanding it excessively.
- Do not re-use the snap ring.
Install the input shaft on the forward clutch drum, and attach the snap ring.
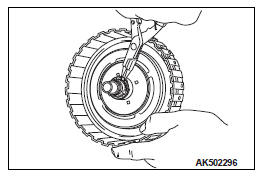
SNAP RING INSTALLATION
CAUTION Do not re-use the snap ring.
Install the snap ring on the forward clutch drum.
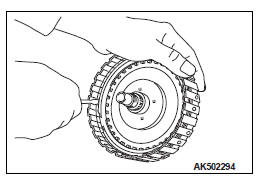
INTERNAL GEAR INSTALLATION
Install the internal gear on the forward clutch drum.
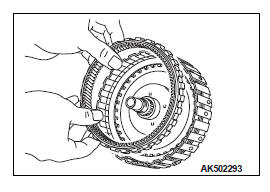
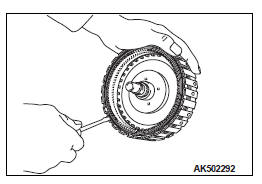
SNAP RING INSTALLATION
CAUTION Do not re-use the snap ring.
Install the snap ring on the forward clutch drum.
INSPECTION
FORWARD CLUTCH SUB-ASSEMBLY
Check if there is a damage, deformation, or burn marks, and replace the forward clutch sub-assembly if any defect is found.
INPUT SHAFT AND INTERNAL GEAR
Check if there is a damage or deformation, and replace if any defect is found.
READ NEXT:
 Reduction Gear
DISASSEMBLY AND ASSEMBLY
Nut
Reduction gear bearing
Reduction gear bearing
Reduction gear sub-assembly
Adjusting shim
Required special tools:
MB990810: Side bearing puller
MB990947: Lower a
Differential
DISASSEMBLY AND ASSEMBLY
Disassembly steps
Differential side bearing
Differential side bearing
Differential sub-assembly
Adjusting shim
Required special tools:
MB990810: Side bearing puller
SEE MORE:
Automatic Transaxle Diagnosis (A/T)
DIAGNOSTIC TROUBLESHOOTING FLOW
INTRODUCTION TO A/T DIAGNOSIS
When the A/T is failed, have an interview with the
user to gather precise information on the failure status.
After that, perform on-board test to check if the
failure is reproduced, and then start repair work. If
the repair work is sta
Anti-lock Braking System (ABS)
General Information
The 4ABS ensures directional skid and control during
hard braking.
This ABS uses a 4-sensor system that controls all
four wheels independently of each other.
EBD *1control can obtain ideal rear wheel brake
force.
The magnetic encoder for wheel speed detection
has been insta
